
Up to now, the Plotting Dashboard has been the workhorse tool to post-process OLGA simulation results in flotools. This new major addition provides users the ability to post-process LedaFlow simulations as well. flotools being agnostic to the type of transient multiphase flow simulator, its user interface offers the same options and user preferences to customize any LedaFlow data-based plot as it does with those of OLGA. Plot types, such as Trends, Profiles, XY profiles/trends, can be directly plotted and analyzed in flotools thanks to its seamless integration.
Although the general workflow to make a plot remains the same as that of an OLGA plot, a few major differences warrant some additional description.
Set up the LedaFlow database
Unlike portable files used by OLGA to save output results, LedaFlow case information is stored in a Database (MariaDB or SQLite). Therefore, prior to adding a LedaFlow case to a flotools workspace, the user should first select the LedaFlow database that contains the case(s) to plot using the following steps:
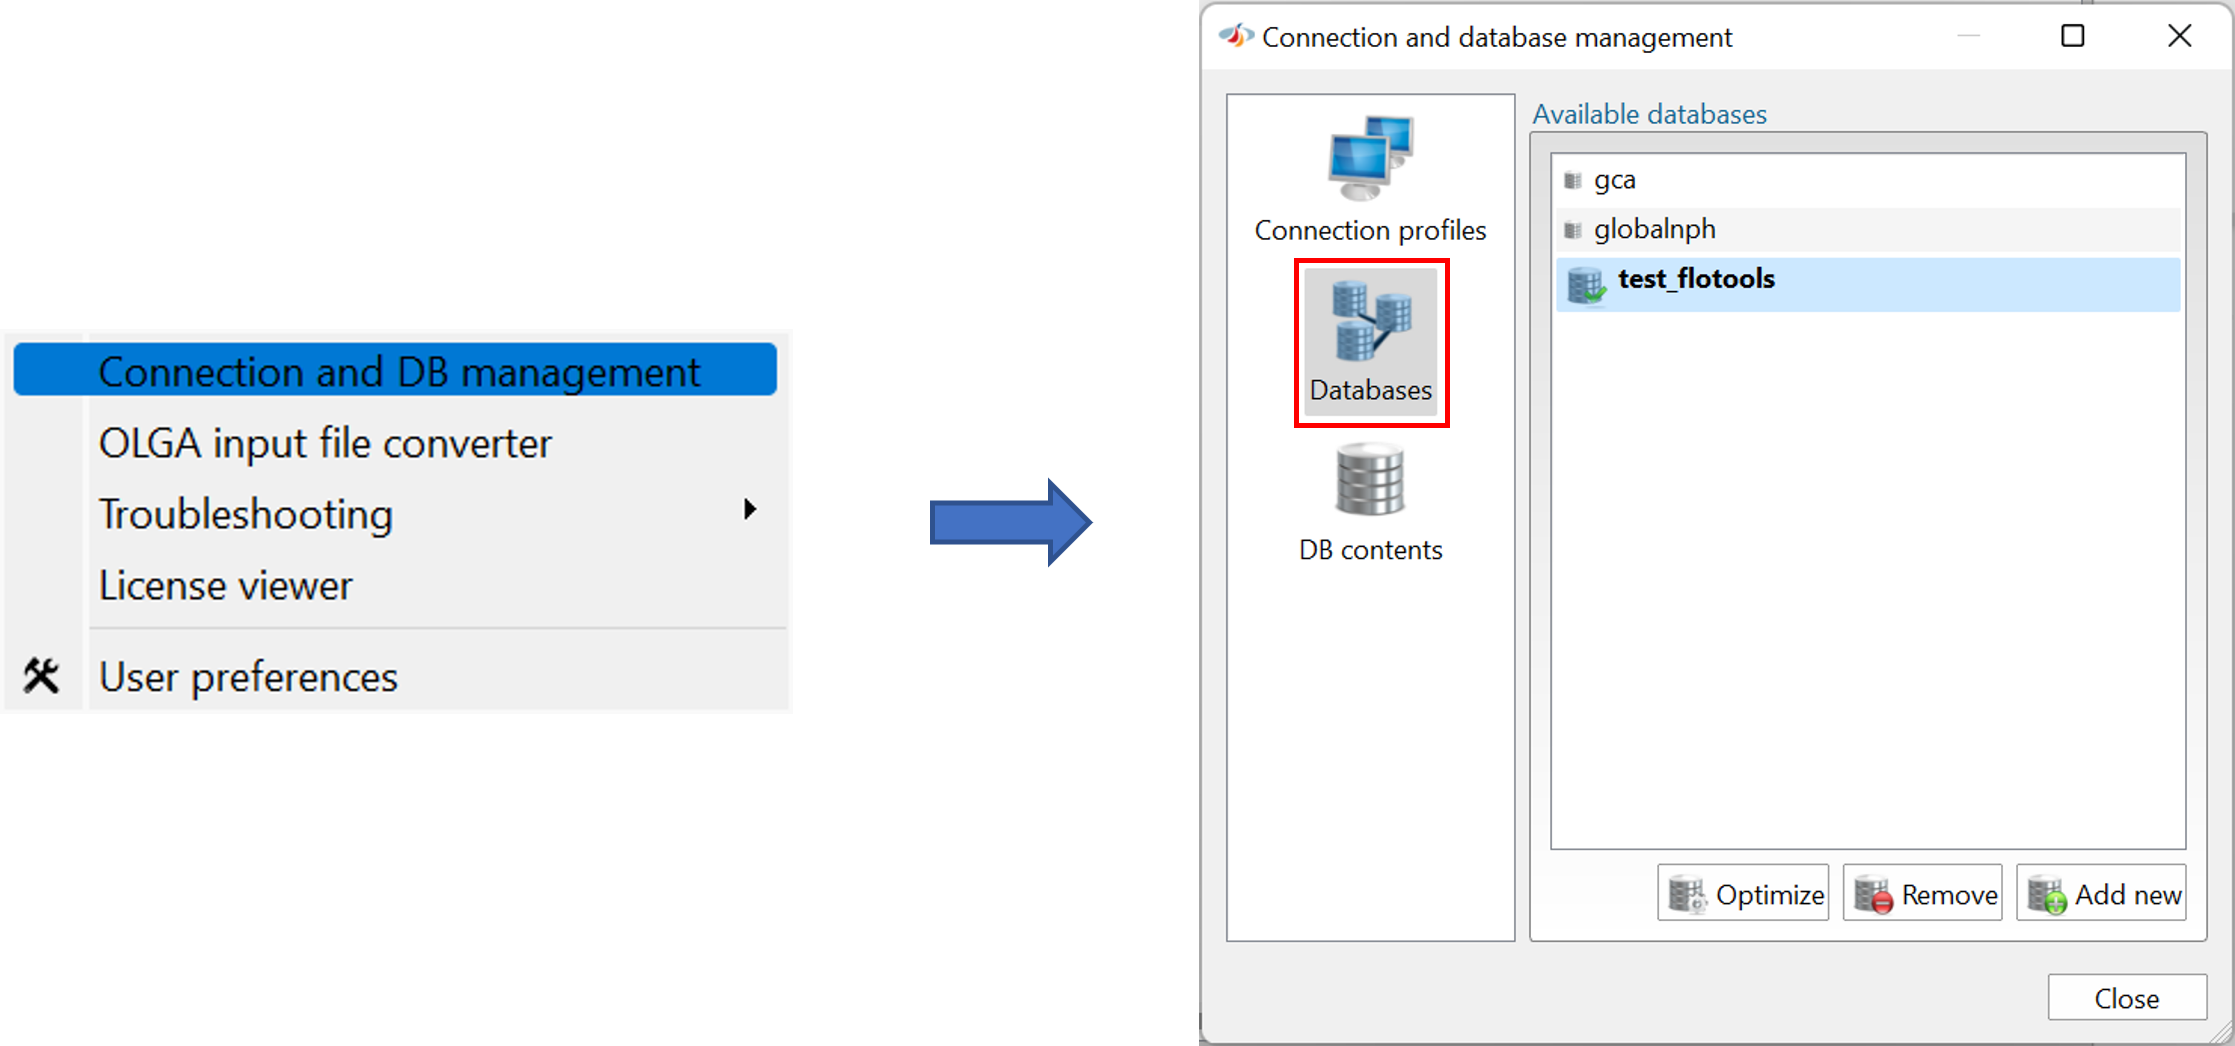
- In LedaFlow main window, open the Tools menu, and click on the Connection and DB management option (Figure 1).
- Select the LedaFlow database of interest.
Add a LedaFlow case to a workspace
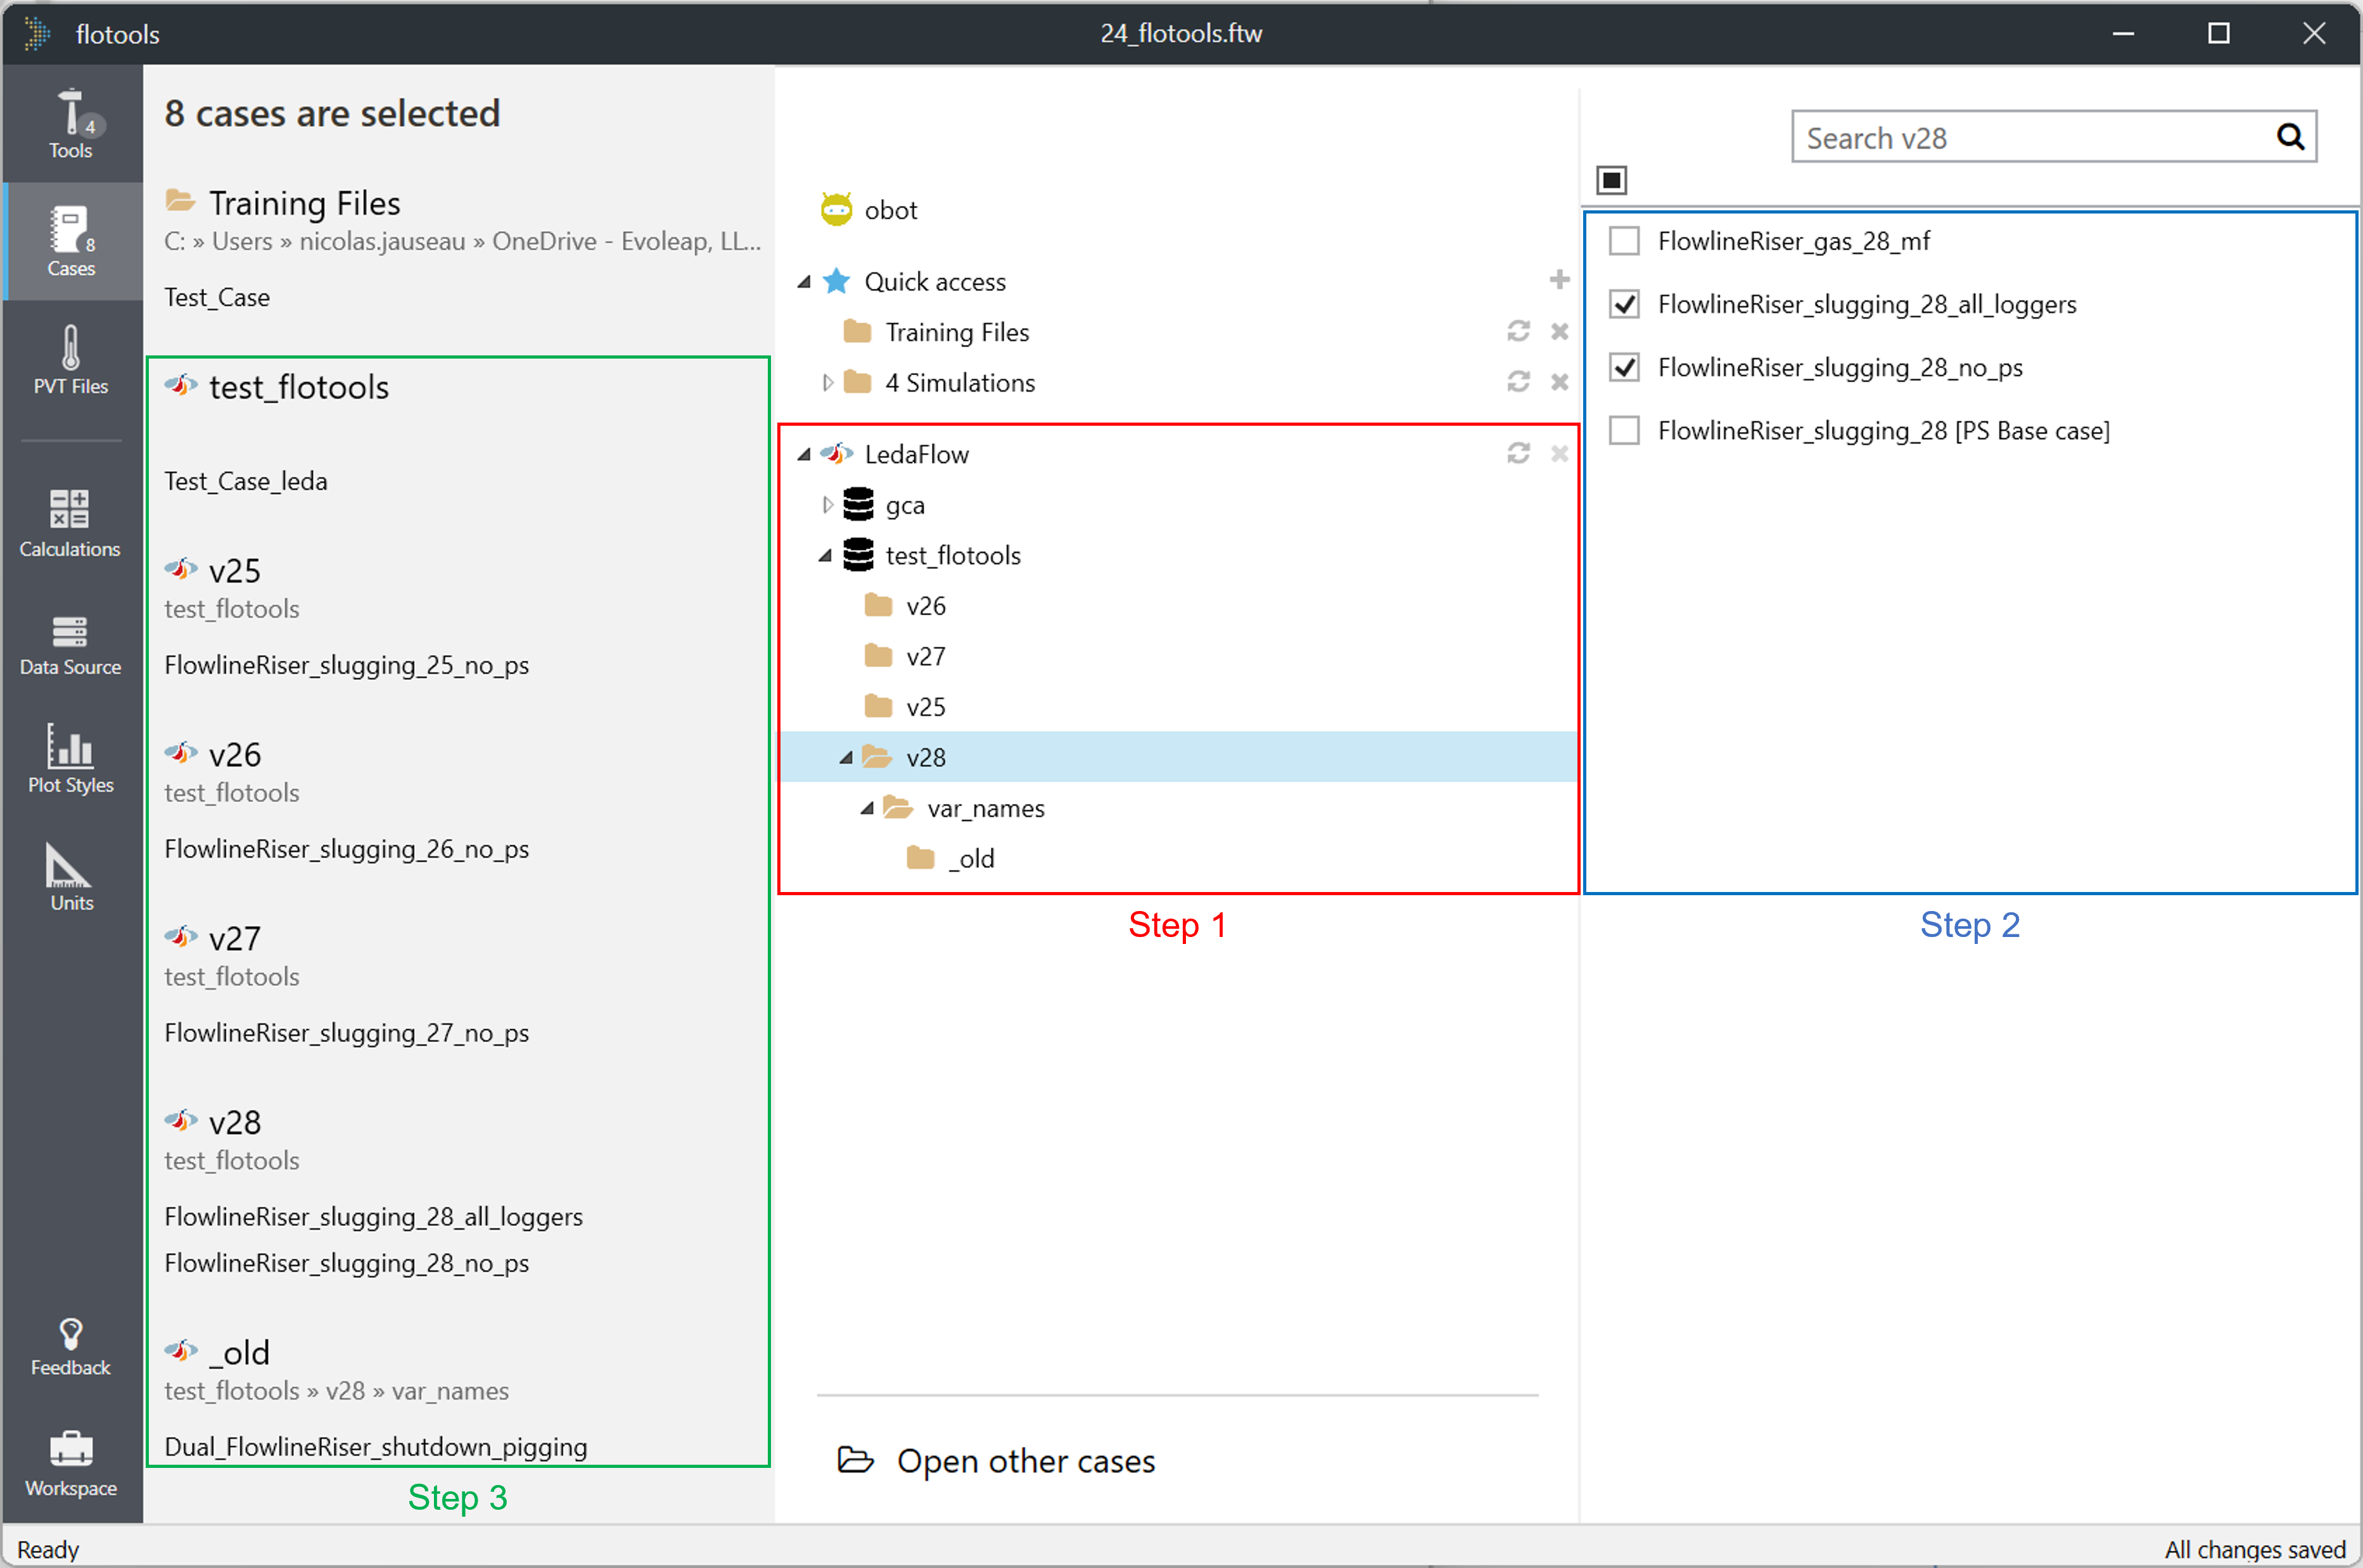
Using the Cases hub in flotools’ left side panel (Figure 2), any LedaFlow case can be mapped (step 1) and added to a flotools workspace (step 2). flotools’ central view replicates the existing LedaFlow databases and their respective browser structure. Once the case is added, it appears in the panel on the window left hand side, under its folder location and (if applicable) path name in LedaFlow case browser (step 3).
Note: flotools doesn’t map any case-free database; that’s the reason why the globalnph database listed in LedaFlow (Figure 1) does not appear in flotools (Figure 2).
Update an existing LedaFlow case
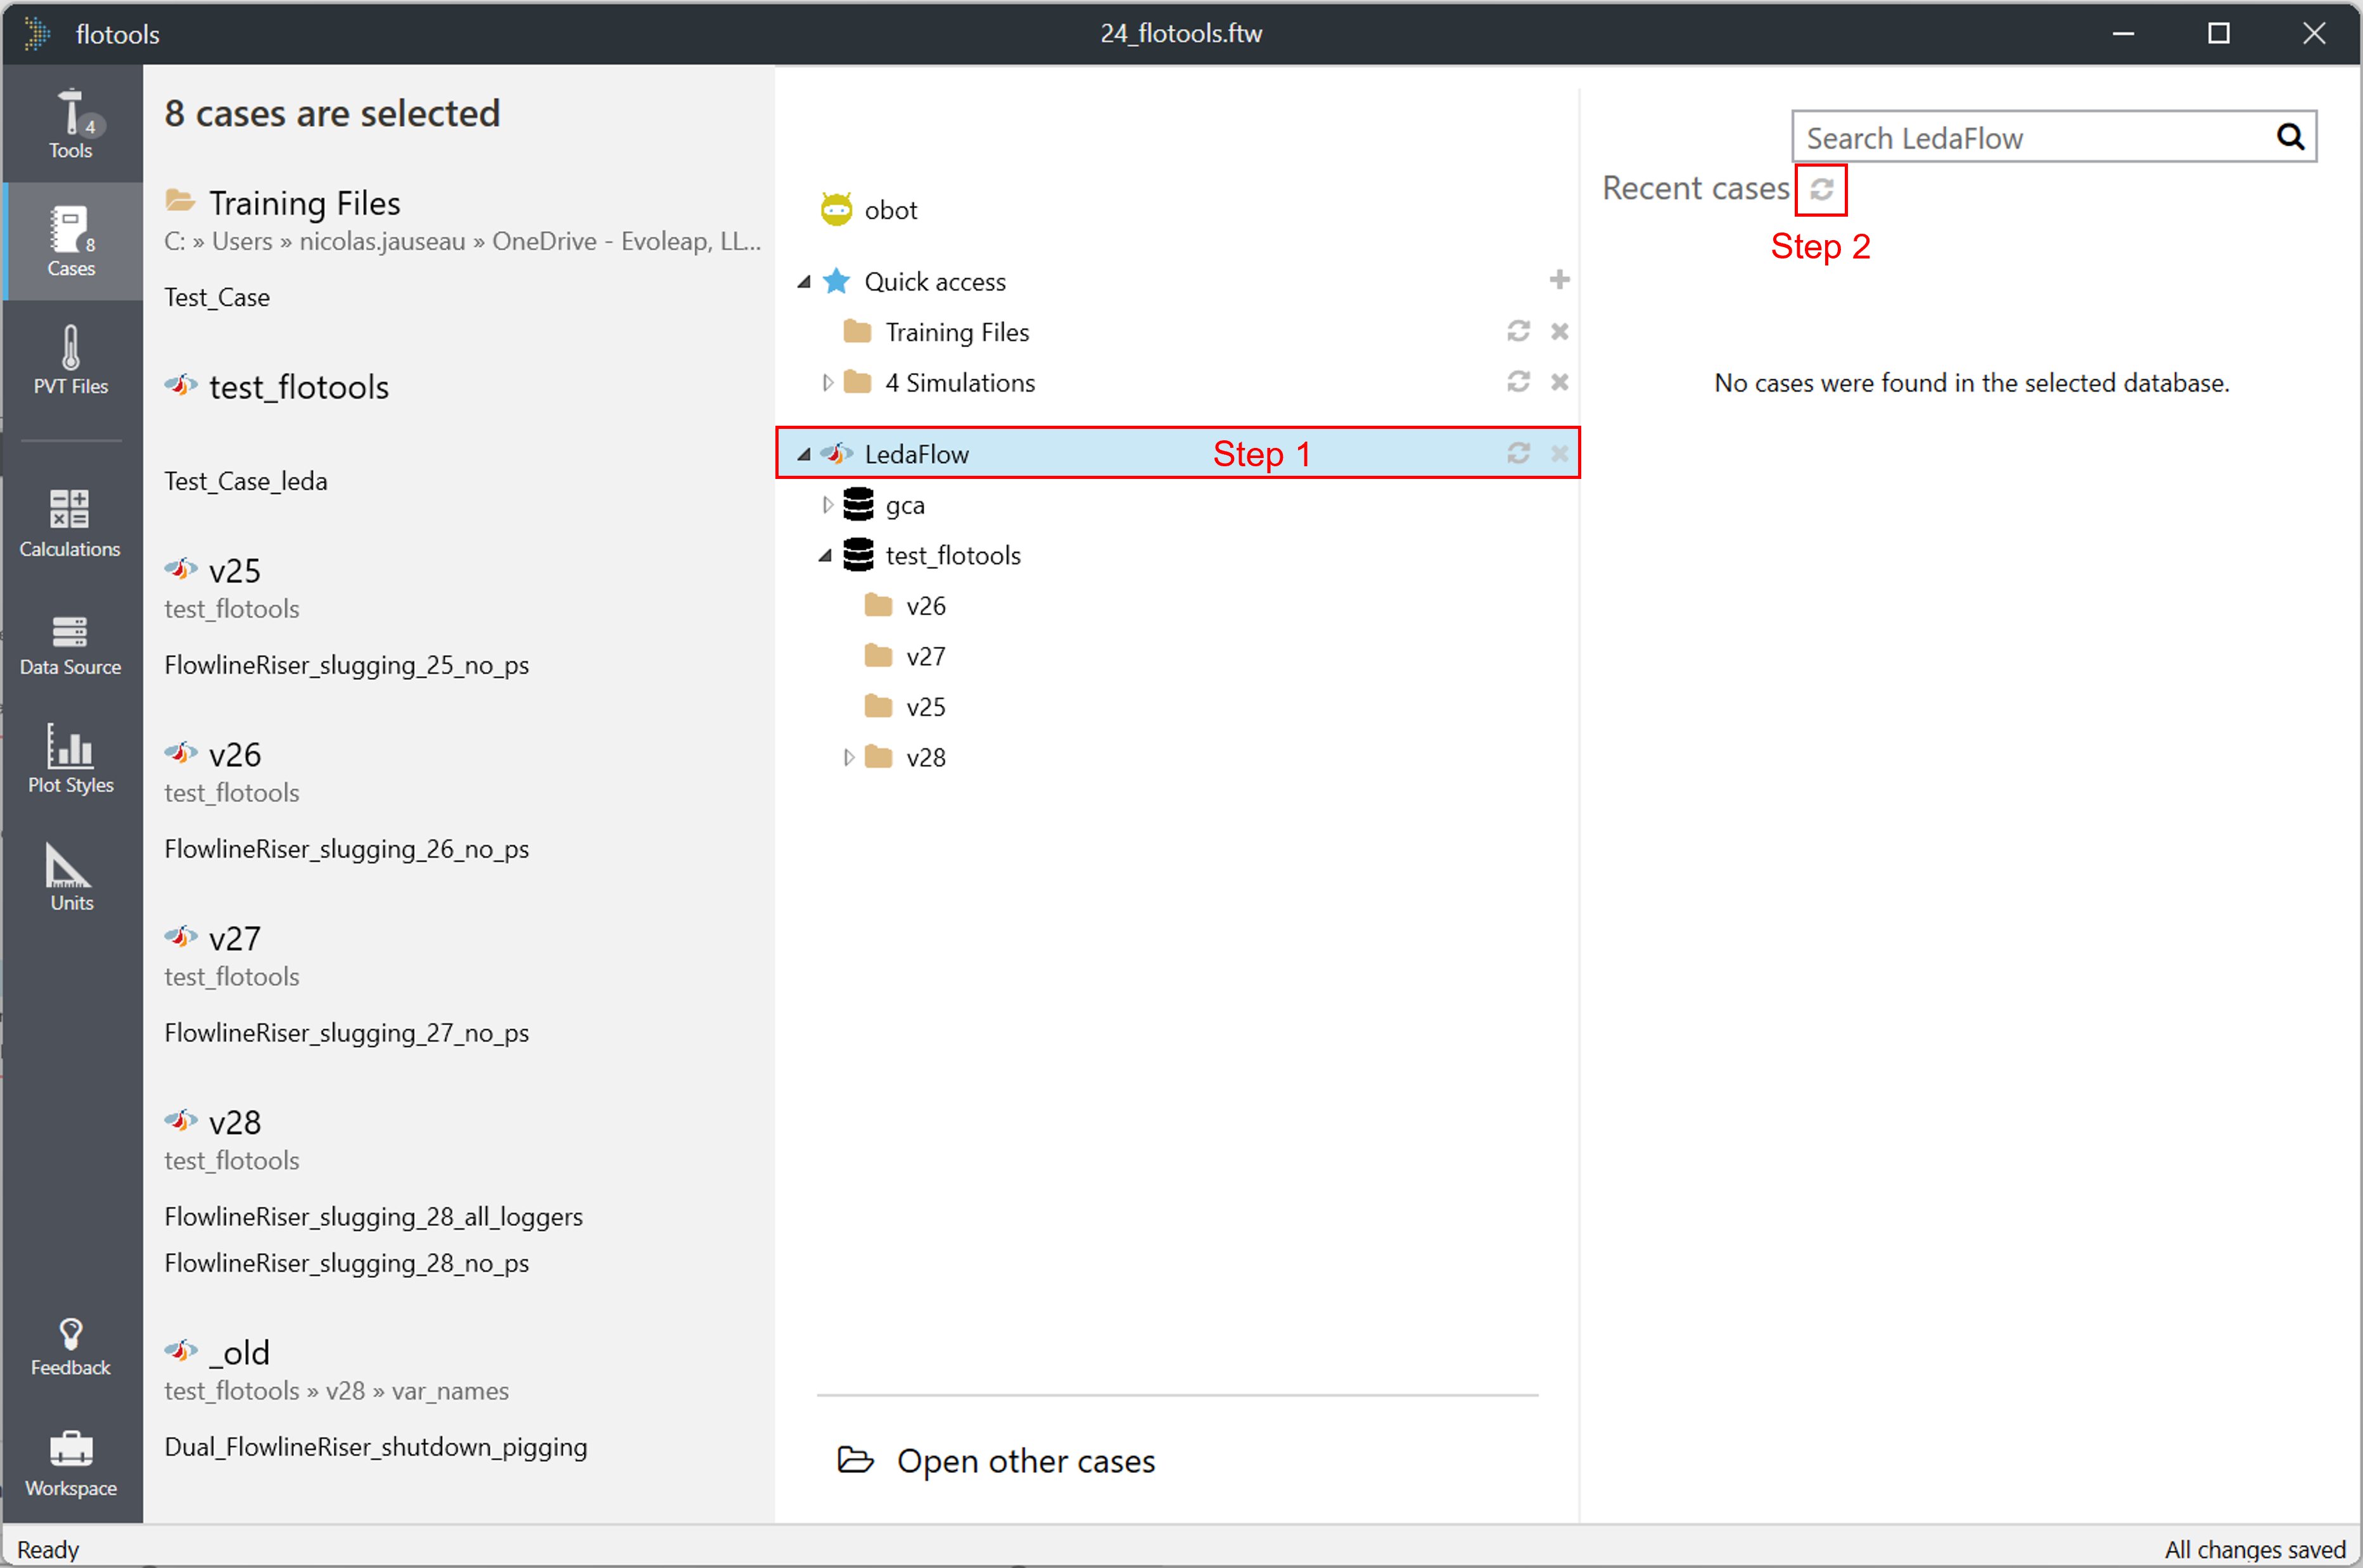
Refreshing an existing case in flotools can be easily performed by first selecting the LedaFlow application (step 1), then manually refreshing recent cases (step 2) as displayed in Figure 3. Any plot using the refreshed LedaFlow case will be automatically updated.
Variable nomenclature with LedaFlow
The LedaFlow variable nomenclature used in flotools was carefully crafted to be consistent with the existing terminology used in the LedaFlow plotting tool. Contrary to OLGA nomenclature where a variable has its own dedicated name, the LedaFlow terminology is based on a multi-level description. This latter generally includes a category name (e.g., density) and, in many instances, field names (e.g., gas, oil,…) to which the variable is applied.
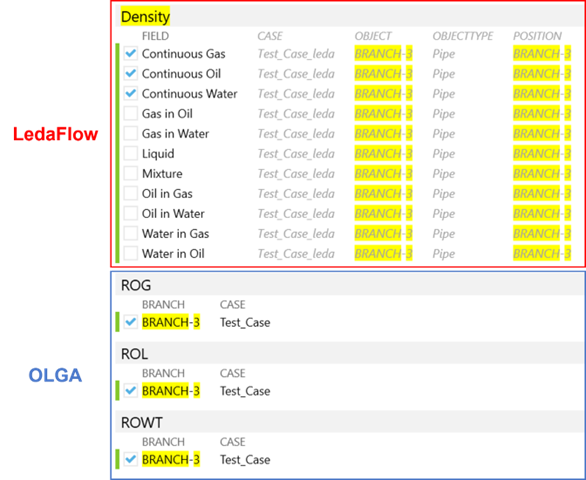
As an example to illustrate this difference, let’s search for some results in a simulation case using the density variable. On one hand, each OLGA-based density variable has its own dedicated name, e.g., ROG, ROL, ROWT… (see Figure 4, bottom view). On the other end, LedaFlow results report only one density variable with multiple application fields displayed in column FIELD (see Figure 4, top view).
Current limitations:
- Some plot types, such as Parametric, Surge volume, and 3D holdup, are not supported yet.
- Simulation cases with more than 50,000 time values (i.e., time steps) are not supported.
- Plots won’t display for cases that do not belong to the selected database in LedaFlow (aka Support for a single workspace per LedaFlow database).